Grooming Your Horse


Grooming Your Horse for Competition – Clipping
By Linda Shaddy
With Josephine Cozean Styron
 You can spot a Linda Shaddy-prepared model horse from across an arena. There is a polished look to her horses. And, that is just any exhibitor wants.
Whether you are showing in model (halter) or performance classes, Linda has some clipping tips to make your horse looks good.
She does have a couple of caveats: For some of these clipping tips, your horse needs to have been previously desensitized to clippers. And, never use a #40 blade clippper on a horse’s legs. It cuts too closely. Use a #40 only on the inside of the ears, the guard hairs of the eyes, the lip whiskers, heels, and the bridle path. For the legs, the outside of the ears, and under the jaw, use a #10 or #15 blade.
Legs and Feet
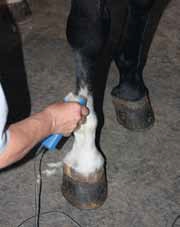
On the front of the leg, start clipping from the bottom, right above the coronet band, with an upward motion. You will go with the hair grain and blend it in. On  the back of the leg and on the fetlocks, clip against the hair grain, to the ankles, then blend it in. If you have a dark foot, stop trimming at the ankle. If the horse has a white sock, take your clippers all the way up to where the color starts. Don’t use white spray or chalk. If you strip these white legs, they will be very pretty. You always want to take all the white hair off. It will help get rid of any yellow or grass stains. For a foot that has lacing (roaning of dark and white hair), blend from the dark hair to the white.
Don’t blacken chestnuts on the leg. You can remove them. Soften them with baby oil or mineral oil, then take hold of them and peel them off. For the extra skin (toe) at the end of the fetlock, remove it by twisting, or you can cut it off.
If the hoof has cracks in it, trim it. Then sand it off so that it’s level. Take putty, wood filler or resin and stuff it in to fill the crack, then sand some more. Use coarse sand paper, then medium, and then fine sandpaper. Finish with fine steel wool. Don’t forget to sand a little behind the hoof. One good way to hold sandpaper is to put a comb in it, then fold the sandpaper over it to give it stability.
Trim and shoe your horse not more than two weeks before the show.
The Bridlepath and the Forelock
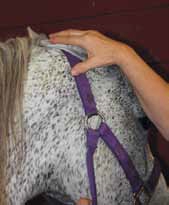
One good rule of thumb for trimming the bridle path is to use the length of the horse’s ear. Lay the ear against the mane. The length of the ear is where you can start the trim. This rule holds pretty well except for babies and yearlings. Another good rule is to measure upwards from the throatlatch. This will make the mane a little shorter. Remember, every horse is different, so modify these rules to fit your horse.
Traditionally the mane should always be on the right side. You don’t want any hair on the back side.
Move your hand back from the measuring point, then pull back the mane. Then, using a #40 blade, move the clipper forward toward the ears so you don’t over clip. Go all the way to the poll line.
You are going to braid the forelock, so you want to trim the forelock from underneath. Don’t trim too much, just enough to keep the forelock from being too bushy.
The Face
For the guard hair of the eyes and the lip whiskers, use a #40 blade. If your horse objects to clippers, use a throwaway razor. Like a bee inside a flower, you are going to get the inside nose hair if you are going to show.

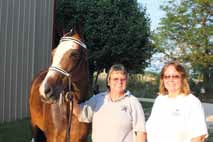
Thanks to Little Miss Perfection (gray horse) owned by Anita Pate and Tri-Mi Goody Two Shoes owned by Linda Shaddy. Linda Shaddy and Jan Cunningham show off Tri-Mi Goody Two shoes.
Trim the chin to the hairline. Go upwards against the hair grain for the jaws and nose, then trim both up and down, so you won’t have any tracks, and blend it in. Under the chin, use a #10 or #15 blade.
You are only going to trim the face and ears on a horse that is a show horse. Because of flies and possible eye danger, if your horse is not a show horse, don’t trim this closely or don’t trim at all. The hair protects your horse from flies and the guard hairs around the eyes protect the eyes from dangers in the stall and field.
Following these steps will help you make your horse look its best.
